Hello everybody, I hope you’re having an incredible day today. Today, we’re going to prepare a distinctive dish, nescafe mocha layer cake. One of my favorites food recipes. This time, I will make it a little bit unique. This is gonna smell and look delicious.
Nescafe Mocha Layer Cake is one of the most favored of recent trending meals on earth. It’s simple, it’s quick, it tastes yummy. It’s enjoyed by millions daily. Nescafe Mocha Layer Cake is something that I’ve loved my whole life. They’re fine and they look wonderful.
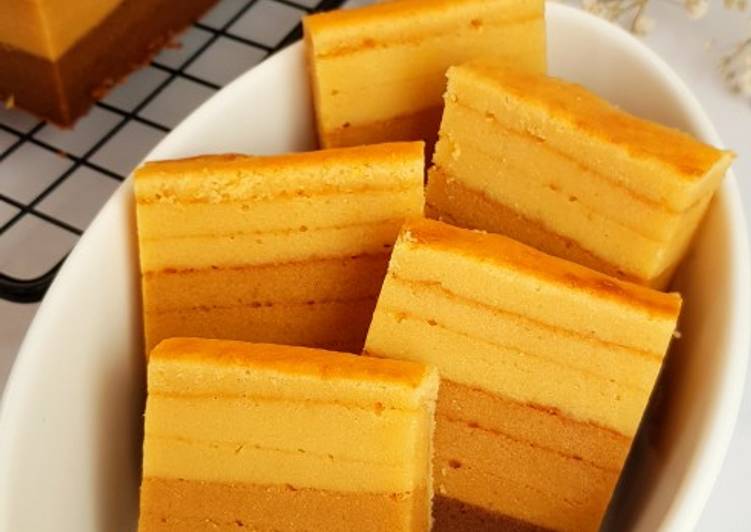
Recipe of Nescafe Mocha Layer Cake
To get started with this recipe, we have to first prepare a few components. You can have nescafe mocha layer cake using 20 ingredients and 10 steps. Here is how you cook that.
Ingredients
The ingredients needed to make Nescafe Mocha Layer Cake:
- Get A. Creamed
- Make ready 500 g unsalted butter
- Make ready 100 g castor sugar
- Prepare 1 tsp Ovalette (optional)
- Get (Cake emulsifier)
- Make ready B. Wet Ingredients
- Take 350 g condensed milk
- Take 200 g Kaya/Sri kaya
- Make ready (Coconut jam)
- Prepare C. Add one by one
- Make ready 10 large eggs
- Take D. Sifted
- Prepare 300 g fine flour/flour
- Take 100 g coffee mate
- Get 200 g Horlicks
- Take (Also known as Malted Milk Powder)
- Get E. The Flavours
- Prepare 1 1/2 tbsp coffee essence + 2 tsp milo
- Make ready 1 tbsp browning sugar
- Prepare 1 1/2 tsp mocha paste
Instructions
Steps to make Nescafe Mocha Layer Cake:
- Line and grease an 8” x 8” cake pan.
- Using an electric hand mixer, beat A (butter, sugar and Ovalette) until pale and creamy.
- Add in B and beat until well combined.
- Add C (eggs) one by one, mixing well after each addition.
- Next, add in D (sifted ingredients) in two additions. Mix well after each addition using the lowest speed of your mixer. Stop once batter is looking smooth. Divide batter equally into three separate bowls (Bowl - A, B and C) and add the flavours.
- Bowl A - plain batter. Bowl B - coffee essence and milo (mix well). Bowl C - browning sugar and mocha paste (mix well).
- Baking and Layering- preheat oven to 150°C (depending on the oven). Start with Bowl C. Divide batter in Bowl C into three portions. Put the first portion into the baking pan and spread it evenly. Bake this first layer for 10-13 minutes using ‘bake’ function.
- Remove from the oven and put the second portion of the batter (of the same colour) on top of the cooked layer. Bake again for 10-13 minutes but this time using the grill function (top heat). Repeat the same process with the last portion (of bowl C).
- Repeat the same process with bowl B and bowl A. As for the very last layer (last portion from Bowl A), turn the oven back into ‘bake’ function. Cover the cake with aluminum foil (optional-only if the top last layer browning too fast) and bake for 15 minutes. Remove and leave to cool before serving.
- Note: Thinner layer needs shorter time to bake (5-7mins). As for this one, the layer is slightly thicker, hence the 10-13mins. Lightly press each (cooked) layer with something flat to remove any excess air before putting the next one. This is still optional. Some would brush a very thin layer of jam (of any kind) or condensed milk on top of the cooked layer. Jam or condensed milk is used to glue/bind the layers together.
As simple as that How to Make Nescafe Mocha Layer Cake
So that is going to wrap this up with this special food nescafe mocha layer cake recipe. Thank you very much for your time. I am confident you can make this at home. There is gonna be interesting food in home recipes coming up. Don’t forget to bookmark this page on your browser, and share it to your loved ones, friends and colleague. Thank you for reading. Go on get cooking!
Print this page